UC Santa Barbara's interactive campus map allows you to locate buildings, parking lots, points of interest, and much more - all from your computer or mobile device. Use wayfinding to find walking directions from point to point on campus.
About the Campus Map
UC Santa Barbara's interactive campus map offers significantly more information and functionality than a printed map or non-affiliated online map. Optimized for desktop and mobile devices, the map is a valuable utility to help campus community members and visitors navigate our beautiful campus.
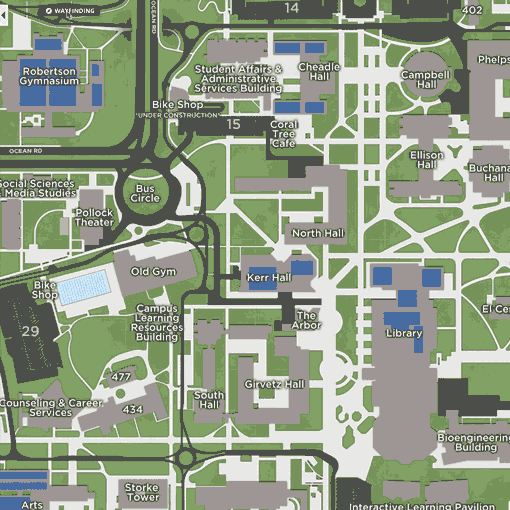
Renderings of the campus academic and administrative buildings, athletic facilities, residence halls, and more have been created from satellite imagery and on-site photography to ensure an accurate representation.
Locations on the map are conveniently organized by category and subcategory. A location can be a building, structure, landmark, or other point-of-interest. Each location can include one or multiple images and a detailed description with links for more information. In addition to the category navigation, individual locations can also be found via the search bar.
Finding Locations
Desktop Users
The map's main index houses all of the map’s information. To navigate the main index on a desktop device, use the (left-hand) navigation menu to explore categories, subcategories, and individual locations.
To begin, click a category to expand and view all subcategories and locations under that category. When you click on a location’s title, you'll see that the location is identified with a marker and the map will focus on that location. A sidebar containing a description and images related to the location will also expand.
Clicking a checkbox next to a category or subcategory title will show all of the corresponding locations on the map. You can select more than one box to show the contents of multiple categories simultaneously.
To search for locations, use the search box in the top left-hand corner of the desktop view. Once a search result is selected, the location will display as described above.
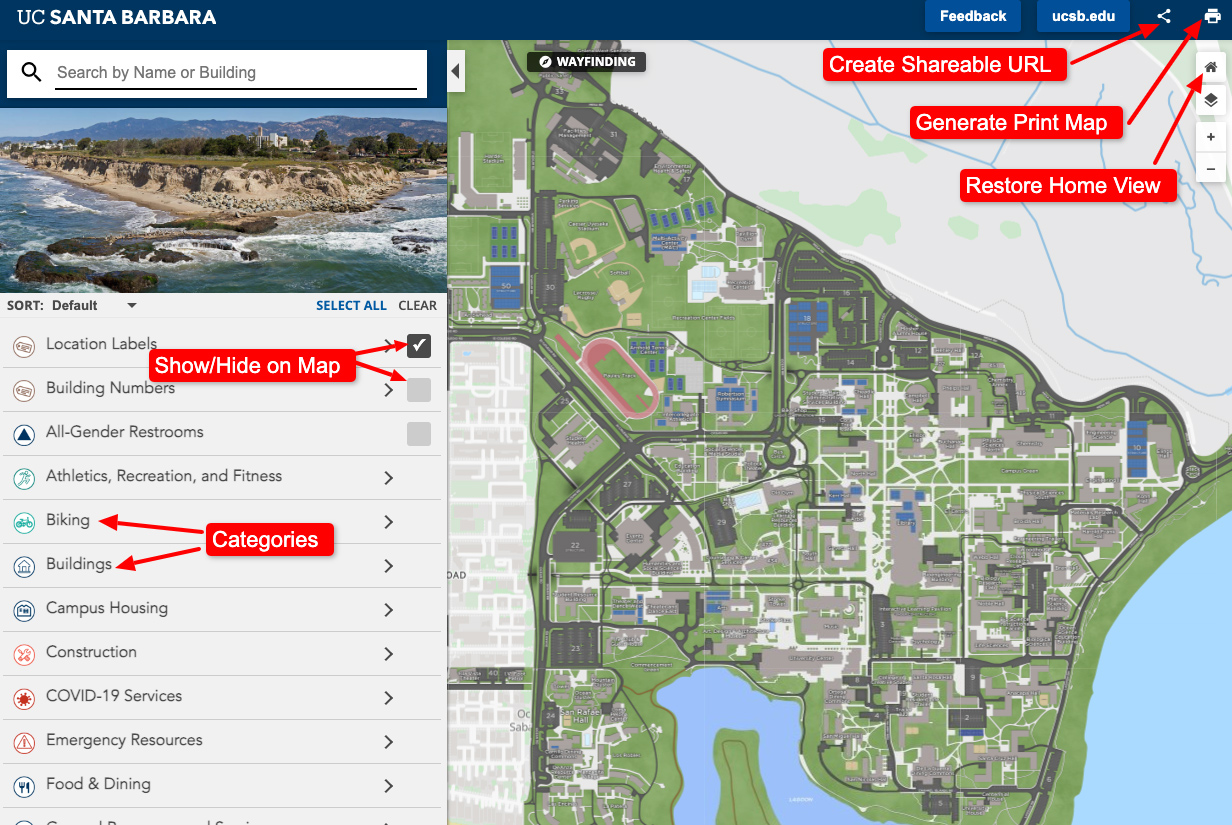
Campus Map on Desktop & Laptop
Campus Map on Mobile
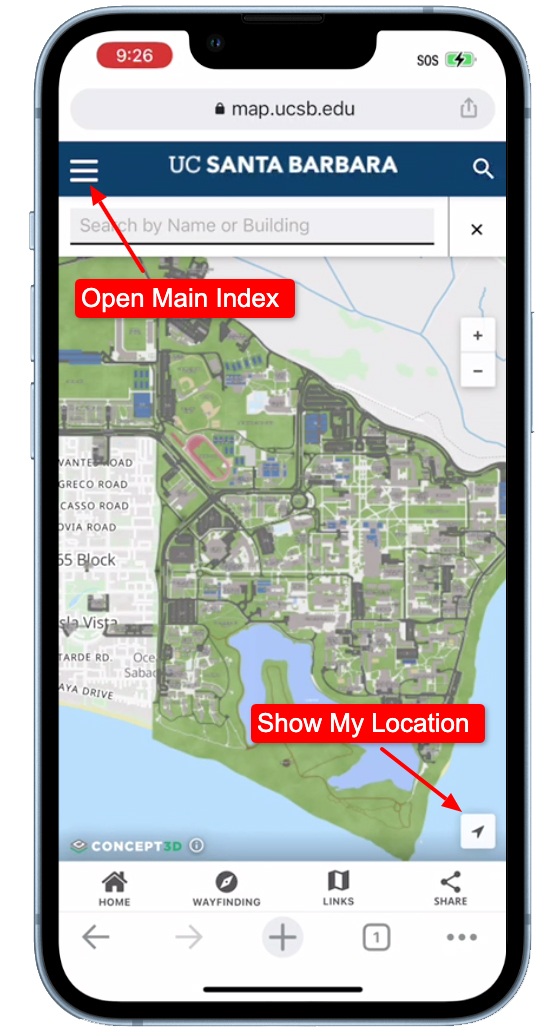
Mobile Users
Click the three bars (hamburger menu) in the upper left corner to open the main index.
Under the main index, you will see the list of main categories.
Tapping a category arrow will expand it so that you can browse different subcategories and locations within that main category.
Tapping the checkbox for a category or tapping a location title will highlight the locations on the map. Collapse the main index to see locations selected. Details about a location can be found by tapping on the location maker. Expand the description box at the bottom of the screen by clicking the ^ (up caret) to view details of that location.
To return to the main map, press the X button or the hamburger menu at the top of the screen.
Tap the search icon on the top left of the screen to search for locations.
Wayfinding
The Wayfinding tool allows you to find the most efficient way to get from point A to B on campus.
- Click on the Wayfinding button in the top left corner of the map.
- Find a walking path by entering a starting and ending location OR by dragging the start and end markers on the map.
- Follow your path line to get to your end location! Once your path line has been created, you will see the distance and estimated time to get to your destination.
TIP: When you're on a mobile device, make sure to activate your GPS location so you can more easily follow the Wayfinding route.
Share a Wayfinding path by clicking the share button in the top right corner of the Wayfinding box.
Sharing a Map View or a Location
To share your current map view, desktop users can click on the share icon located in the upper right corner of the screen. Mobile users will find the icon in the bottom right corner of the screen. This will create and copy a URL that you can share with someone. While you have a location's information panel open, the share icon will be in the upper left corner (of both desktop and mobile screens). You'll be able to direct friends or family members to that exact location and its corresponding information by copying the URL, or by sharing directly to social media.
Generating a Printable Map (Desktop/Tablet Only)
The Print Map Generator allows you to create customized print maps on the fly that can be used for events and visitors.
- Click on the printer icon at the top right corner of the map.
- Once the Generate Print Map button is clicked, you will see a legend of options on the left and a red box over the map on the right.
- Select the Page Size (Letter, Legal, A4), Orientation (Landscape or Portrait), and Resolution. Note that higher resolutions will take longer to generate.
- Choose the categories and/or locations you want to include on the map by checking/unchecking the boxes next to the listed locations. If there are any tours on the map, you can click the tours tab to print the tour stops and routes.
- Select the view of the map to be printed inside the red box, you can pan around and make the box smaller or larger.
- Enter the title for your print map file. Next, choose the file type (PDF or PNG), if you would like grid lines to display on your print map (this will give a lettered and numbered grid to match locations on the map with the legend), and select if you want numbered markers or location marker icons. Finally, you have the option to print just the map imagery (with no legend or icons), turn off the map layer behind the renderings, turn off the 3D renderings themselves, the coordinates, or the compass.
- Once you have completed your customization, click the Generate Print Map button at the bottom of the legend. After about 30 seconds, you will have a custom print map!
Featuring the Map on a Website
Questions or Feedback?